Tag: tools

  • Best ai 3d modeling tool 2026

    Best ai 3d modeling tool 2026

    The landscape of digital content creation has shifted dramatically in 2026, moving away from labor-intensive manual sculpting toward automated generative workflows. As demand for immersive content in gaming and spatial computing accelerates, the industry now prioritizes tools that deliver instant text-to-3D and image-to-3D capabilities without compromising topology. This analysis evaluates the current market leaders, specifically examining how Tripo AI positions itself against competitors like Meshy and Hyper. The focus lies on identifying the best AI 3D modeling tool capable of producing professional-grade assets with efficient geometry and high-fidelity textures.

    Key Insights

    • Speed vs. Quality: Modern algorithms now generate standard “white mold” (geometry-only) models in under 20 seconds, a benchmark set by leading platforms.
    • Topology Control: Professional workflows require more than just a mesh; they demand clean topology and rigging readiness, features now integrated into browser-based studios.
    • Asset Scalability: The ability to upscale textures to 4K resolution is becoming a standard requirement for game development and cinematic rendering.
    • Market Leadership: Data indicates that platforms utilizing large-scale models (200 billion+ parameters) offer superior geometric accuracy compared to earlier generative iterations.

    The Evolution of the Best AI 3D Modeling Tool

    The definitive AI 3D modeling tool in 2026 is defined by its ability to balance generative speed with the structural integrity required for professional pipelines, moving beyond simple prototyping to final asset delivery.

    The search for the best AI 3D modeling tool has historically been plagued by a trade-off between speed and usability. Early iterations of generative AI often produced “soup-like” meshes—models that looked acceptable from a distance but lacked the edge flow necessary for animation or game engine integration. However, recent advancements have introduced algorithms capable of instant generation with topologically sound structures.

    Tripo has emerged as a significant entity in this space, leveraging a massive 20 billion+ parameter AI model to address these geometry challenges. Unlike basic generators that rely solely on surface approximation, this approach ensures that the output is not just a visual representation but a functional 3D asset. For developers and designers seeking a robust AI 3D Model Generator, the distinction lies in this underlying architectural complexity.

    Instant Text-to-3D and Image-to-3D Generation Capabilities

    Efficiency in 2026 is measured by the “20-second rule,” where top-tier tools can transform a simple text prompt or single image into a fully realized spatial object without manual intervention.

    For game developers and rapid prototypers, time is the most critical resource. The industry standard has tightened significantly; waiting minutes for a cloud based generation is no longer competitive. Analysis of Tripo reveals a capability to generate standard models in approximately 20 seconds, supporting rapid iteration cycles. This speed is vital for Text to 3D Model workflows where designers must generate dozens of variations to find the perfect silhouette.

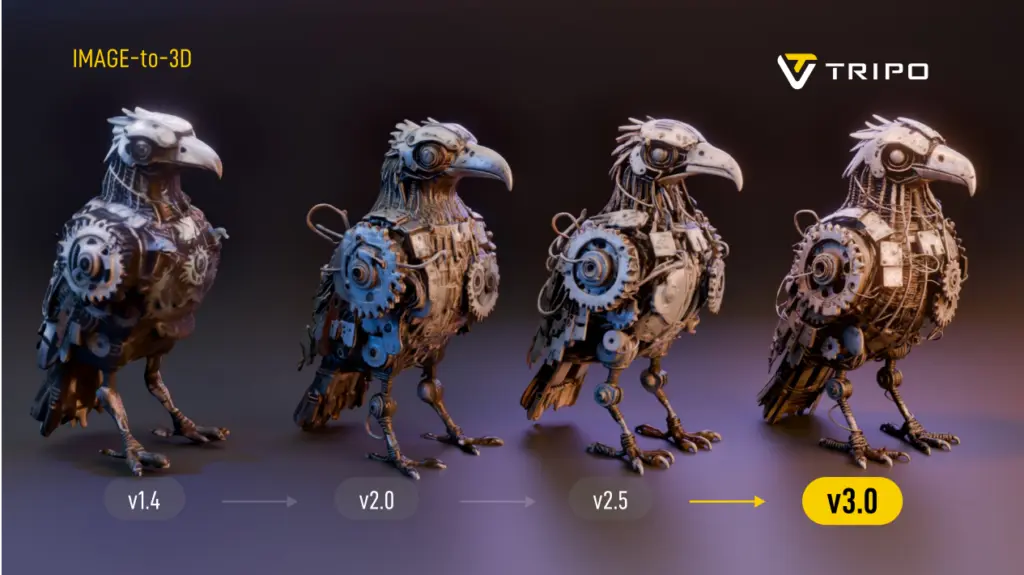
    Furthermore, the Image to 3D Model functionality has evolved to handle multi-view consistency. A major pain point in previous years was the “hallucination” of back-facing geometry—where the AI would guess incorrectly what the back of an object looked like. Current best-in-class solutions utilize multi-view consistency algorithms to ensure that an input image results in a coherent 360-degree model. This allows creators to bypass the modeling phase entirely for static props and background assets.

    Professional Workflows: Topology, Rigging, and Texturing

    The “best” tool must extend beyond generation into editing, offering features like auto-rigging, retopology, and PBR material synthesis to fit seamlessly into pipelines like Unity, Unreal Engine, or Blender.

    While generation speed attracts attention, retention in professional circles depends on the “Studio” experience. Digital creators require granular control over the mesh. Tools like Tripo Studio have introduced interactive editing capabilities that allow for fine-tuning of grids, topology control, and component completion. This shift marks the transition from “AI as a toy” to “AI as a workspace.”

    Texture quality is another differentiator. An AI 3D Editor must support high-resolution outputs. Tripo, for instance, supports upscaling models and textures to 4K resolution, ensuring that the visual fidelity holds up on large screens and high-definition renders. Additionally, the integration of Auto-Rigging features significantly reduces the technical barrier for animators, automating the skeletal binding process that traditionally takes hours.

    Comparative Analysis: Tripo vs. Meshy vs. Hyper

    In the competitive US market, selecting the right tool depends on specific project needs; Tripo excels in geometric precision and asset volume, while competitors have niche strengths.

    The following table breaks down the capabilities of the leading AI generators in 2026.

    Feature SetTripo AIMeshyHyper
    Core StrengthGeometric Precision & SpeedTexture/Material GenerationAvatar/Stylized Characters
    Generation Time~20 Seconds (Fastest)1-2 Minutes2-5 Minutes
    Model Size20 Billion+ ParametersUndisclosedUndisclosed
    WorkflowOnline 3D Studio (Full Edit)Web-based ViewerMobile-First/Web
    Max Resolution4K Textures2K Textures1080p equivalent
    Topology ControlHigh (Retopology supported)MediumLow (Fixed topology)
    Pricing ModelFlexible (Monthly/Yearly)Credit-basedSubscription

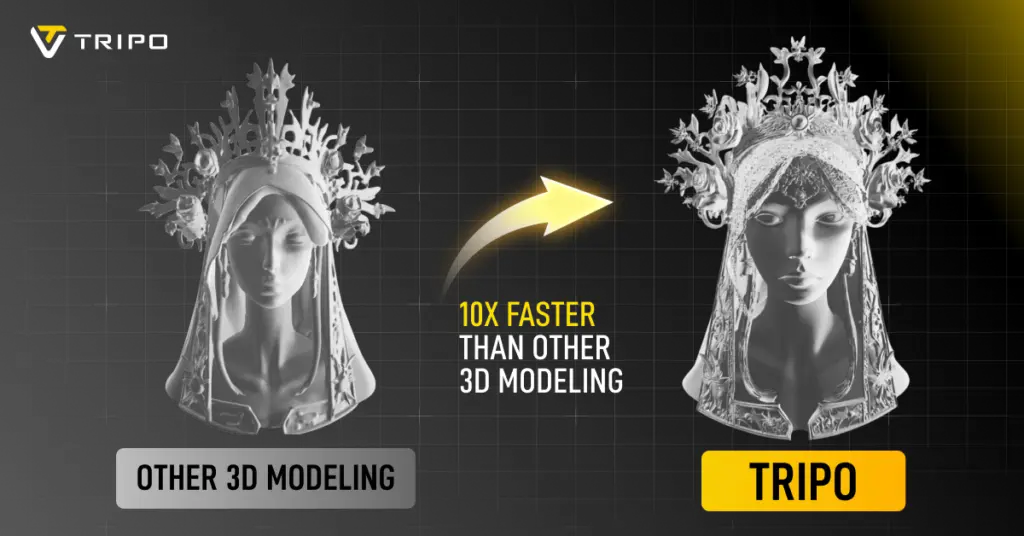
    Analysis: While Meshy provides strong competition in purely artistic texturing, Tripo demonstrates a distinct advantage in structural integrity and speed, driven by its larger parameter model. Hyper remains a viable choice for specific character niches but lacks the broad “generalist” capability required for comprehensive game development environments. The sheer volume of the Tripo asset library—numbering in the millions—also provides a significant head start for creators looking for reference assets.

    Conclusion

    As 2026 unfolds, the definition of the best AI 3D modeling tool has solidified around efficiency, compatibility, and quality. The era of manual vertex pushing for background assets is effectively over. Tools that offer a comprehensive suite—from Prompt to Mesh generation to high-res texturing and rigging—are capturing the market. Tripo’s strategic focus on a parameter model and a holistic studio environment positions it as a definitive solution for professionals seeking to leverage 3D Generative AI for tangible production gains.

    FAQ

    What makes Tripo the most efficient AI-powered 3D generator for game development?

    Tripo reduces the asset creation time to approximately 20 seconds for standard models and supports export to standard formats (GLB/USDZ), making it highly compatible with engines like Unity and Unreal.

    Can I use AI tools to convert 2D images into 3D models for printing?

    Yes, the Image to 3D Model feature is designed to interpret depth and volume from 2D inputs, creating watertight meshes suitable for 3D printing enthusiasts and professionals.

    Does the generated 3D model require manual cleanup?

    While older tools required significant cleanup, modern platforms like Tripo Studio offer built-in tools for topology control and component completion, minimizing the need for external software like Blender or Maya.

    How does the pricing of Tripo compare to other professional tools?

    Tripo offers a competitive pricing structure with a Professional annual plan averaging around $11.94 per month, which is generally more cost-effective than per-asset credit systems used by some competitors.

    Is it possible to generate animated 3D models ?

    Yes, advanced studios now include rigging and animation previews as part of the generation pipeline, allowing users to bind skeletons to their generated meshes automatically.

  • 4 methods to unbrick your Android device

    4 methods to unbrick your Android device

    So your phone is bricked. Your phone won’t boot because you flashed a ROM, installed a mod, modified a system file, or did something else.

    Not to worry! It can probably be fixed. Unbricking an Android device is explained here.

    What ‘Bricking’ or a ‘Bricked Phone’ mean?

    ‘Bricking’ your phone essentially means that your once useful device is now only as useful as a brick. A ‘bricked phone’ is usually unresponsive, won’t power on, and doesn’t function normally.

    How is your phone bricked?

    Depending on how a phone was bricked in the first place, different steps are required to unbrick it. Bricked phones fall into one of two categories:

    • The soft brick. The phone freezes on the Android boot screen, gets stuck in a boot loop, or just goes straight to recovery. So long as something happens when you press the power button, it’s soft bricked. The good news is these are pretty easy to fix.
    • The hard brick. You push the power button, and nothing happens. Hard bricks can be caused by issues like attempting to flash an incompatible ROM or kernel, and there’s normally no software solution for them. Hard bricks are terrible news, but fortunately, they’re quite rare.

    You’re probably soft bricked, and you’ll see something similar to the picture above. Although it’s challenging to develop a one-size-fits-all method to unbrick Android due to the variations in how various devices operate, there are four typical techniques you can try to get things back on track:

    • Wipe the data, then re-flash a custom ROM
    • Disable Xposed mods through recovery
    • Restore a Nandroid backup
    • Flash a factory image

    Before you get started, make sure your phone and computer are set up and ready with the proper tools.

    What you need to unbrick a Android device?

    Most of the equipment you need to repair your phone probably already exist in your possession. Since you already know how to use them because you used them to root your device and flash ROMs, they shouldn’t be a problem. However, make sure before you start.

    Custom recovery is most crucial. This was probably installed when you rooted your phone, however it could occasionally be completely erased or rewritten by the default recovery. We advise using TWRP if you do need to reinstall it. It is a completely functional custom recovery with builds for the majority of common devices but is also far too simple to use.

    Then, you might require ADB and Fastboot. You can obtain both of them from the website for Android Developers, and they are frequently used for rooting and flashing system mods. If you are unfamiliar with Fastboot and ADB, see our introduction to them.

    android sdk tools for unbrick Android

    And finally, some manufacturers use special software to flash factory images. Hopefully, you can avoid doing this, but if you need to, you can use Odin for Samsung, the LG Flash Tool for LG devices, or the ZTE Unbrick Tool if you’ve got a ZTE device. Just make sure that they support your specific model of device.

    Most of these tools will let you fix a bricked Android phone using a PC. However, you can often do the job directly on the phone itself.

    Wipe data and ee-flash a custom ROM

    If you flashed a ROM and Android won’t boot, try this method.

    When you have issues while flashing a fresh custom ROM, it’s one of the most likely scenarios that your phone will soft brick. Your failure to first erase your data is frequently to blame in this situation.

    When you decide to flash a new ROM over top of your old one instead of having to restore your applications and data, this is known as a “dirty flash” and takes place. Generally speaking, if you’re flashing a newer version of your current ROM, you can get away with it, but you must always delete your data anytime you flash a different ROM.

    Fortunately, it’s easy to fix—as long as you’ve backed up your phone properly. If you haven’t, well, you’ve learned an important lesson the hard way. Follow these steps:

    1. Boot into your custom recovery.
    2. Navigate to the Wipe option and choose Advanced Wipe.
    3. Check the box marked Data (you can wipe the system, ART cache, and cache again, too), then hit Confirm.
    4. Re-flash your custom ROM.

    A factory reset is effectively accomplished by wiping your data, although your internal storage or SD card shouldn’t be erased by this process (although, again, you should back it up just to be safe). Your phone will display the Android setup screen after restarting. Your programs ought to start reinstalling themselves immediately after inputting your Google account details.

    You can use your Nandroid backup to recover your data if necessary.

    Disable Xposed Modules in Recovery

    Try this method if: You get boot loops after installing a new Xposed module.

    The Xposed Framework isn’t as common as it once was, but it’s still a simple way to mod your phone, and also one of the most dangerous.

    The best Xposed modules are so easy to install—many of them are available in the Play Store—that they lull you into a false sense of security. It’s unlikely anyone makes a Nandroid backup before installing a new Xposed module, even though they can brick your phone.

    Use ADB Push to Install the Xposed Uninstaller

    The best way to deal with these problems is with the Xposed Uninstaller, if it’s available for your version of Android. This is a small flashable ZIP that you can install through the recovery to remove Xposed from your device.

    If you don’t already have it on your phone, you can put it on an SD card, or you might be able to copy it over using the ADB push method:

    1. Download the Xposed Uninstaller to your desktop.
    2. Connect your phone to your computer via USB and boot into recovery.
    3. Launch the command prompt (Windows) or Terminal (Mac) and use the cd command to change the directory to where you have adb installed.
    4. Type adb push [full path to xposed uninstaller.zip] [full path to destination]. On Mac and Linux, precede the command with ./ (such as ./adb).
    5. When the file finishes copying, flash it through the recovery.

    How to Disable Xposed Modules in Recovery

    If you can’t use ADB push and the Xposed Uninstaller, try either of these solutions.

    This method lets you disable Xposed through recovery:

    1. Boot into recovery, then navigate to Advanced > Terminal command.
    2. Create a file called /data/data/de.robv.android.xposed.installer/conf/disabled
    3. Reboot your phone.

    This method prevents Xposed modules from starting:

    1. Boot into recovery and select File Manager.
    2. Navigate to the folder /data/data/de.robv.android.xposed.installer/conf/ then delete the file modules.list
    3. Reboot your phone.

    None of these fixes will reverse the modifications that the modules have made to your system. You will need to restore your Nandroid backup if these changes bricked your phone.

    Restore a Nandroid Backup

    Try this method if: You need to remove other system mods, replace a tweaked system file, or if the methods above didn’t work.

    The safety net for Android mods and customizations is the Nandroid backup. It’s a full snapshot of your phone, including the operating system as well as your data and applications. You can restore your soft-bricked device to working order as long as you have access to your custom recovery and a Nandroid backup.

    twrp restore bricked device
    1. Boot into recovery and navigate to Restore.
    2. Select your backup from the list, confirm, and wait while it’s restored.
    3. Reboot your phone.

    Nandroid backups are a bit of a pain to make. They take a while and cannot be done in the background. But they’re worth it: they’re the simplest way to unbrick your phone.

    Recover Data From a Nandroid Backup

    A Nandroid backup can also save the day if you had to wipe your data and didn’t back it up in an easily restorable form. It’s possible to extract specific parts of a Nandroid, so you can restore your apps and data without needing to restore the operating system as well.

    Here are the instructions for this:

    1. Boot into Android and install Titanium Backup from the Play Store. While this app hasn’t been updated for a while, it’s still one of the best options for this task.
    2. Tap the menu button and navigate to Special Backup/Restore > Extract from Nandroid Backup.
    3. Select your backup from the list.
    4. Choose whether to restore apps, data, or both, and select them (or hit Select All).
    5. Tap the green tick icon to start the restore process.
    nanddroid backup restore unbrick

    Flash the factory image

    Try this method if: None of the other options work.

    Re-flashing a factory image is your only remaining choice if your attempts to unbrick Android have so far failed. This erases everything on your internal storage and returns the phone to its factory settings. Your phone will be unrooted as well.

    You might be better off trying to flash a stock ROM first because it removes everything. Instead of factory images, OnePlus offers flashable ROMs for recovery. You can find similar files for almost every device at xda-developers.com. For added convenience, you can often flash a stock ROM that has already been root access.

    Flashing a factory image varies from flashing a ROM in that it occurs via a desktop computer connection as opposed to recovery. Other devices make use of customized software while some use the Fastboot utility from the Android SDK. For instance, Samsung makes use of the Odin tool.

    The instructions for flashing a factory image vary for each device due to the various techniques used. Additionally, not all manufacturers make their firmware accessible to the general public, so you must find them from unofficial sources.

    Here’s where to find factory images for some popular Android brands:

    Hard brick?

    Hard bricked phones are notoriously more difficult to fix, but thankfully they’re also much rarer.

    How to unbrick a hard bricked Android device

    Make sure the phone is truly bricked by plugging it in and letting it charge for some time. Try to reset it by depressing the power button for 10 to 15 seconds (or removing the battery if your gadget is older). You might also want to try putting it into your computer; if your PC does not recognize it, you can be very sure that your phone has been severely bricked.

    If it is unquestionably hard bricked, your options may be limited. A USB Jig, a little gadget that fits into the USB port and puts the phone into Download Mode to reload the default software, can resurrect a few phones.

    On eBay, you can find cheap USB Jigs for hard-bricked phones, but only for a very limited selection of outdated gadgets. Even then, there is no assurance that they will be successful.

    Beyond that, you might need to either find a local phone repairman or send your phone in for repair (though rooting it might have void your warranty). However, you’ll probably end up having to buy a new gadget.

    Stay safe

    Hopefully, this guide has helped you to unbrick your Android phone. And hopefully, your experience hasn’t put you off rooting and hacking Android altogether.

    But if you’d rather play it safe in future, you can still have a lot of fun with your phone. Take a look at our guide to the best Android tweaks you can make without rooting for some amazing ideas.

  • Unlock powerful hidden tools in Android 12 developer options

    Unlock powerful hidden tools in Android 12 developer options

    One of the first things you should do when you get your new Google Pixel 6 or 6 Pro is open the hidden “Developer options” menu. Don’t be put off by the word “developer” because this hidden Android 12 menu contains functionality that any Android user can use.

    If you don’t have a Pixel 6 or 6 Pro, you can still access the “Developer options” menu on any other Pixel model, as well as devices from other OEMs such as Samsung. If you haven’t updated your system or purchased a Pixel 6 or 6 Pro, I’ll teach you how to accomplish it on Android 12. If you haven’t updated your system or purchased a Pixel 6 or 6 Pro, the process is basically the same on older Android versions.

    android developer tools

    Enable developer options in Android 12

    Open up your Settings app and tap “About phone” from the list. To get to this menu even faster, use the new search tool in Android 12 from your app library (swipe up on the home screen), search for “about,” and select “About phone” from the results.

    After that, scroll down to “Build number.” This is the backdoor to revealing the “Developer options” menu. Simply tap “Build number” at least seven times in a row, then confirm you want to unlock the menu by entering your PIN. (The PIN interface is concealed in screenshots, as shown below.)

    For a few moment, you should see “You are now a developer!” appear to let you know it worked. You’ve already unlocked the menu if it reads, “No need, you’re already a developer.”

    Newly unlocked developer options

    Return to your Settings app’s main menu, hit “System,” and then select “Developer options” from the bottom of the list. Unlike “About phone,” you can’t search for “developer” in your app library’s search bar to get there right away, but you can locate it in Settings’ search bar.

    In “Developer options,” there are plenty of things to explore. While there are plenty of reasons to unlock “Developer options” on your Pixel in Android 12, some quick ones to note include keeping your screen awake while charging, starting the process for unlocking your bootloader, making software updates install themselves when your device restarts, and showing a dot on the screen for each tap you make.

    USB debugging is another popular setting that lets you use ADB to talk to and issue commands to your Android device from your computer.

    Reset the developer options

    Let’s say you suspect that something you enabled in “Developer settings” is causing your Pixel to malfunction or produce unexpected results, but you have no idea what the issue is. In that situation, you may quickly restore the developer menu to its previous state.

    To do so, open the menu and untick the “Developer options” checkbox at the top. Then, on the “Allow development settings” prompt, toggle it back on and tap “OK.” Everything you changed in the menu earlier will be reset to their settings on Android.

    Hide the developer options

    You can hide the “Developer options” menu if you no longer want to utilize it. Toggle off the “Developer options” switch at the top of the menu by opening it. You won’t be able to get back into the menu unless you repeat Step 1 above.
    If you later re-enable “Developer options,” it will revert to its default settings, so any tools and preferences you specified before will have to be redone.

  • 4 free tools to get latest updates on your Samsung Galaxy devices

    4 free tools to get latest updates on your Samsung Galaxy devices

    If you’ve ever tried looking for firmware to install on your Samsung Galaxy smartphone or tablet, it might be pretty annoying. While companies like Google, OnePlus, and Xiaomi provide download links on their websites, Samsung has yet to provide an official firmware download portal. That’s one of the reasons why there are so many Samsung firmware download sites out there. These sites scrap Samsung’s FUS (Firmware Update Server) for the latest firmware releases and categorize them by model number, carrier/region, and OS version. However, many of these services use a “freemium” model that throttles the base-tier download speed.

    Fortunately, there is no shortage of community-developed tools to directly download a new software update for a compatible Galaxy device. We’ve talked about two such tools — SamFirm and Frija — many times in the past. Samloader is another open-source, cross-platform alternative. While I personally think that downloading Samsung firmware using one of these utilities is simple enough, some may still find them inadequate to meet their needs. If you do, then here are a few more solutions that make it even easier to grab official Samsung firmware packages for your device.

    1. SamFirm_Reborn

    samsung update tool

    Created by XDA Recognized Developer Ivan_Meler, SamFirm_Reborn is a reincarnation of the original SamFirm tool. The developer decompiled the legacy application and patched the codebase to make it compatible with Samsung’s server-side changes. SamFirm_Reborn is open source and it does offer a handy command-line interface besides the familiar GUI.

    Download SamFirm_Reborn

    2. SamFirm-continued and SamFwTool

    SamFirm Continued
    SamFwTool

    SamFirm-continued started its journey as yet another open-source fork of the legacy SamFirm, but the maintainer abandoned the project a few months ago. Later on, XDA Member Tungtata picked up the baton and created SamFwTool. One of the highlights of SamFwTool is the auto-detection feature. Just connect your phone in MTP mode and press “Auto detect” to identify your device model and region code.

    Download SamFwTool

    3. SamFirm.js

    The whole Samsung firmware downloading saga is now on a different level, as XDA Recognized Developer jesec has presented SamFirm.js, a streaming downloader, decryptor, and extractor coded in JavaScript. With SamFirm.js as the backend, you should be able to construct a web app to fetch stock Samsung firmware packages. The project is a collaboration between developers jesec and LuK1337.

    Download SamFirm.js

    4. SamFetch

    In case you’re looking for a web API variant of the Samloader project, you should try out SamFetch. XDA Member YusufCihan reimplemented the functions from Samloader’s code as web routes in order to expose a simplified REST API to download Samsung firmware.

    Download SamFetch